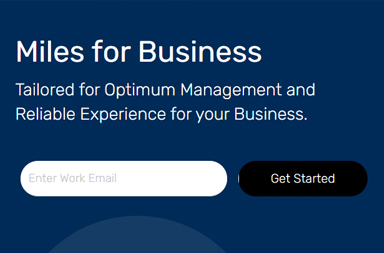
Miles for Business
Tailored for Optimum Management and
Reliable Experience for your Business.
Getting Started for Business Admins
Follow the steps in this guide to get your organization started with company-wide travel programs and more.
Create Your Account
Creating a business account will take only a few minutes.

How to create your business account
Have your work email and personal Miles login credentials ready.
1. Enroll with your business email
Tell us a little bit about your company. You must use your business email with your organization’s domain (example: admin@companyname.com).
Sign up for Miles for Business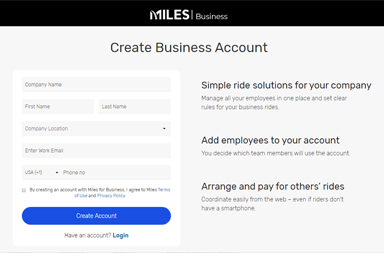
2. Create your business account
Choose your business location and enter your business email and phone number. We will send you an verification email, once verified you’ll be prompted to create a password to sign in to your account.
Create an Miles Account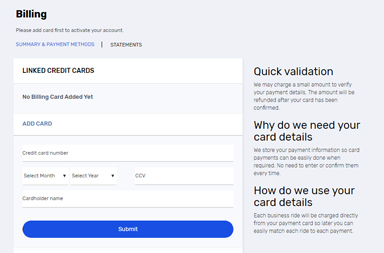
3. Access the admin dashboard
Once you’re signed in, you will need to add business billing details. Once completed you can access the dashboard to start creating policies, groups, add riders and sub-admins.
Sign in to Dashboard
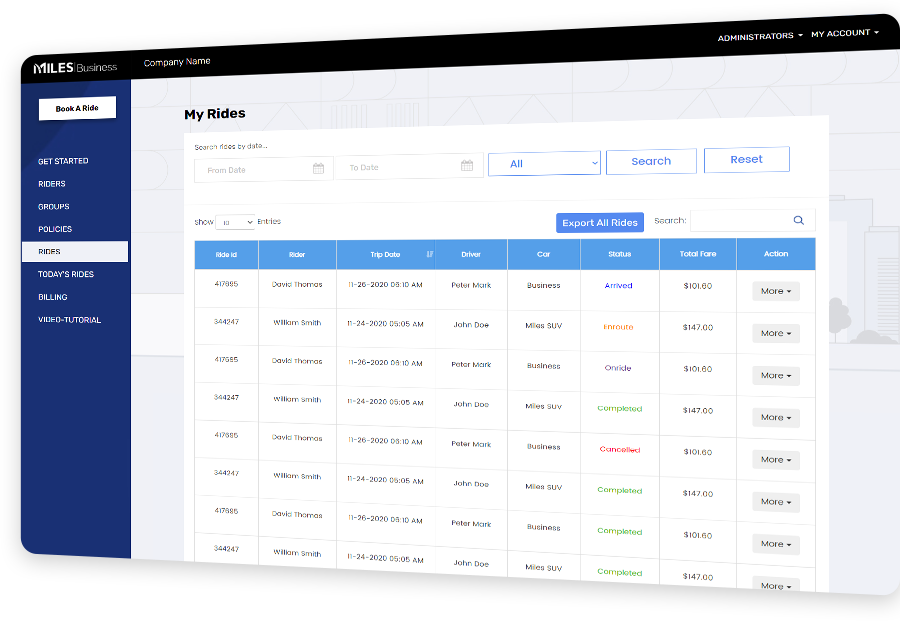
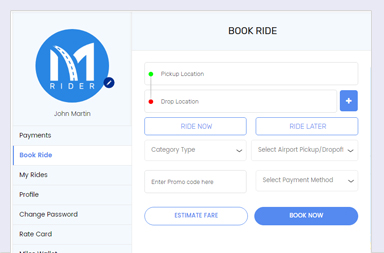
Manage company travel all from one dashboard
Gain insights into how your teams move with Miles for Business. Set custom permissions and monitor travel usage and spending. Support is available 24/7 for business accounts.
Next StepAdd Policies, Rules & Groups
Determine when and where your employees can take rides on the company account.

Let's set up your first policy
You can always create additional policies or make changes to existing policies later.
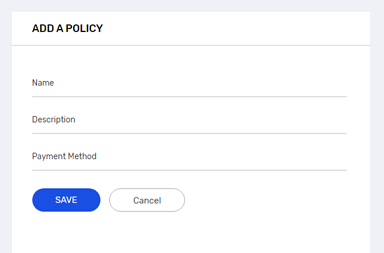
1. Add a policy
Give your policy a name and description to differentiate it from other policies.
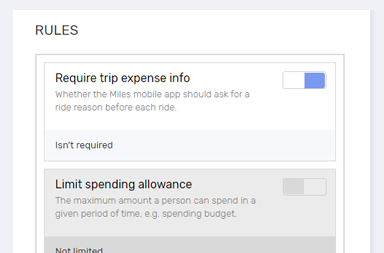
2. Set a ride rules
Make sure that employees are taking rides that align with your company's policy.
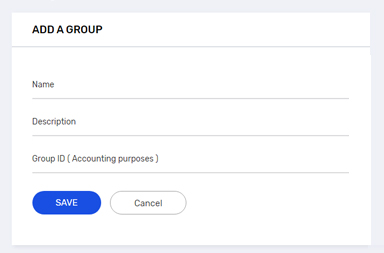
3. Create a group
Choose which groups can access this policy. We'll get to adding employees later, so don't worry if you haven't create any groups yet—you can choose them later.

Courtesy rides
Request rides for your customers and guests with Miles for Business. Show your customers you care by arranging their rides to get them where they need to go. They don't even need the Miles app.
Next StepAdd Riders
Before creating a group you need to add rider(s), employees in the rider tab.

Let's add who can ride under your company's policy
This is where you have to add rider(s), employees. Riders will have the option to charge all trips to the company account based on the permissions set by the admin.
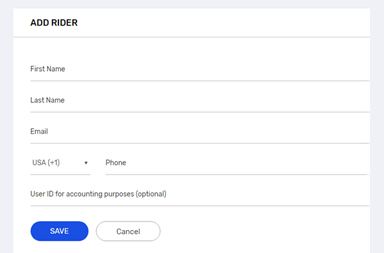
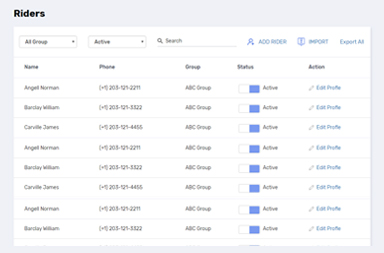
1. Add a rider
Go to Riders and add new. You need to enter name, email and phone number with area code. If you have multiple riders, you can always upload the list of people with CSV file.
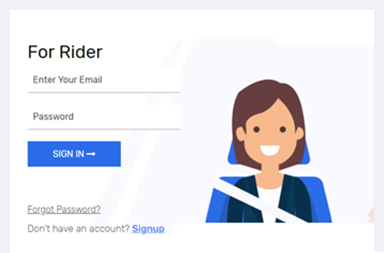
2. Already a Miles rider
If rider already use Miles for personal rides, use riders registered phone number. Don’t worry, rider personal and business info are always kept separate.
Rider Sign In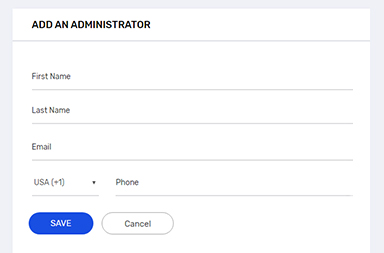
3. Create rider as an admin
To give admin rights to the existing rider, the rider email must be a work email domain, example (employee@companyname.com).

Simplify your group travel management
Organize team travel quickly and easily. Log in to the dashboard to set user permissions, control spending, and handle billing. It's simple to add new users, review your team's rides, and track how much they spent.
Next StepCreate, Export & Upload
Let's make sure you have created and uploaded all your employees in Miles for Business portal, before you plan to send out the invitations.

Two ways to add employees
You can add employees individually or bulk upload them from a spreadsheet (CSV file). If you need to add more than 15 employees, we recommend uploading a spreadsheet.
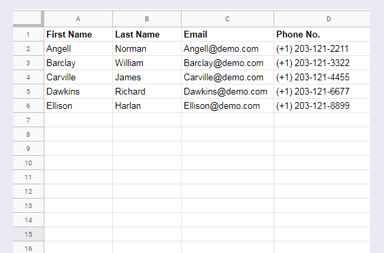
1. Create
Fill out a spreadsheet with the following columns: First name, Last name, Email, Phone , Employee Id (optional), Group (optional).
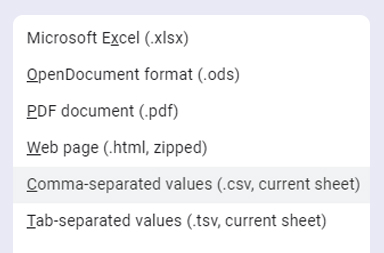
2. Export
Export the spreadsheet as CSV file and save it to your computer. In Google Sheets, go to File > Download as. In Microsoft Excel, go to File > Save as.
3. Upload
From the "Rider" section of the dashboard, select "Import" and follow the prompts to upload the file.

Create a group
From your Companies dashboard, select Group then"Add Group" and then the purpose for the group. Give the group a name and description. Then, select which programs employees in this group can use. Select or add the employees you want to be in that group. A rider can be in only one group at a time.
Next StepPlan Your Launch
Make sure your employees are aware of the plan and prepared for the launch. Surprise email invites can cause a lot of confusion.

Let your employee's know about Miles for Business
When you add someone to your Miles for Business account, they'll receive an automated email inviting them to join the account. It’s important to communicate the following.
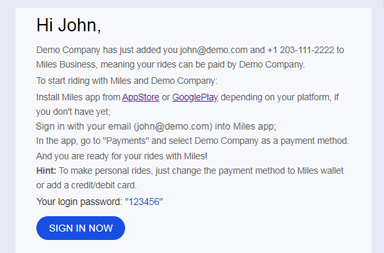
1. Check your work email
Employees will receive an email invitation to join your business account. They'll need to activate their account before they can take rides on the company account.
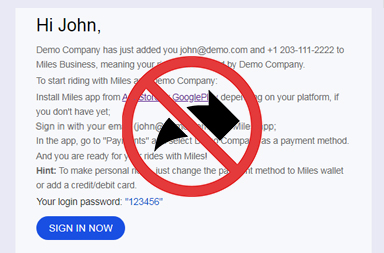
2. Don't share your invites
Each invitation link is customized to an individual email address. Forwarding emails or sharing links with other employees will give access to the wrong employee.
3. Sign in to your existing account
If someone already uses Miles, they should sign in with their personal account credentials—not create a new account. Your business account will appear as a profile in the "Payment" business section.
Give your team access to what they deserve
Easily define how your people ride via an all-in-one dashboard, and the Miles app does the rest. They'll never have to worry about taking out-of-policy rides or finding their receipt for expense reports.
First StepOne Solution
Your personal and business rides can be a hassle when you are trying to sort them for the expenditure. Miles helps you organize your expenses with a separate business account.

Miles Business Platform
Miles offers reliable corporate transport solutions. Everything is easier with Miles, from starting budgeting to administration.

Simplified Employee Management
Add all your employees to your Miles Business Account, sort them into different groups, import employee list from excel, set budget restrictions for employees and view previously booked rides and expense details.

Less Documentation
Reduced paperwork. Get digital format-friendly statements. Less extensive documentation for accounting.

Cashless Transactions
Skip individual employee expense reports. Streamline your transactions and make payments with company credit cards.

Transparency
Miles guarantees the satisfaction of being upfront with all costs. This means there are no hidden fees or charges, to help make your life easier.
Personalized to Perfection
We synchronize in your work pace, that's right. We update your transport requirements, while you work.
Safe for Around the Clock Businesses
Call centers, hotels, restaurants- any business with late-night shifts, Miles provides a safe ride experience for all your employees.

Reliable on Business Trips
Miles makes business rides hassle-free with the pre-scheduled ride option. Irrespective of the nature of the ride, rely on Miles for the perfect experience.
Hospitality
Miles makes you look courteous and hospitable with comfortable rides in the presence of your associates.

Employee Perks
Need an easy way to provide travel perks and benefits for your employees? Ensure employee satisfaction with Miles.